

Plug and Play
Connects straight to the fan’s RJ45 or RJ11 port

Full Fan Control
On/off, open, close, speed up, slow down, reverse airflow

Speaks Fluent I2C
Compatible with Raspberry Pi, ESP32, Arduino, etc

Smart Home Ready
Perfect for Home Assistant automations
We're the bridge between your fan and any microcontroller

Deluxe, Plus or Compact
These fans already come with with a port to control them. Normally this is done with a simple button panel, but our controller emulates this same protocol to enable a whole host of new possibilities. The controller can do anything the button panel can do: On/off, open/close, in/out, faster, slower, and auto temperature.

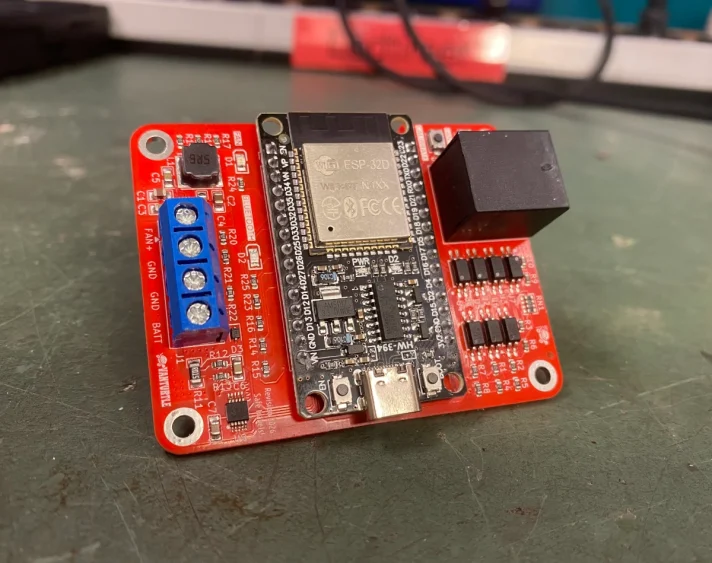
VanTurtle Fan Controller
The controller translates the fan’s proprietary signals into the industry standard I2C bus. Just connect an Ethernet or phone cable to the fan and you’re good to go. For Deluxe models it can also sense if the auto temperature hold mode is on. The controller is extensively documented and extendible.

Microcontroller
All you need is I2C support, so you can integrate it with almost any microcontroller. Raspberry pi, ESP32, Arduino, STM32, the works. Integrate it into Home Assistant, write your own python scripts, control it over Bluetooth, anything you’d like. Whatever setup you’re running, the VanTurtle controller fits right in.

New and improved
The second iteration of the controller makes for a smaller 65x45mm board and brings along many improvements.
Perfect for your build
No two van builds are the same, so you can fully personalize the connectors of the controller. You can choose which ports, terminals, and connectors you want, and we’ll hand-solder them onto the board for you. No worries, we make the selection process straightforward and guide you toward the right options for your fan model and setup.
If you prefer a more hands-on approach, you can also order the board with all ports and terminals left unpopulated. That way, you’re free to solder directly to extra pads on the board or use connectors you already have on hand.
Made by fellow travelers
Designed by van enthusiasts for van enthusiasts, the VanTurtle Fan Controller was created for anyone who has experienced having to leave a cozy bed to fetch the remote control. Created to solve our own problems while building a van and refined from there, you can be assured that the card is made to last.
We’re here to help whenever you run into an issue, just shoot us an email!
Prefer something simpler?
Our smart controller seamlessly integrates with iOS or Android over Bluetooth with no coding required. It is powered from the existing fan wiring, so no additional supply or complex installation is needed. It does not get any easier.
If you want to tinker a little more than that, it can also be flashed with MQTT or Zigbee firmware. Or no firmware at all. Still includes a buck converter and ESP.
Frequently Asked Questions
Will it work with my fan?
Can i return it?
How does it work?
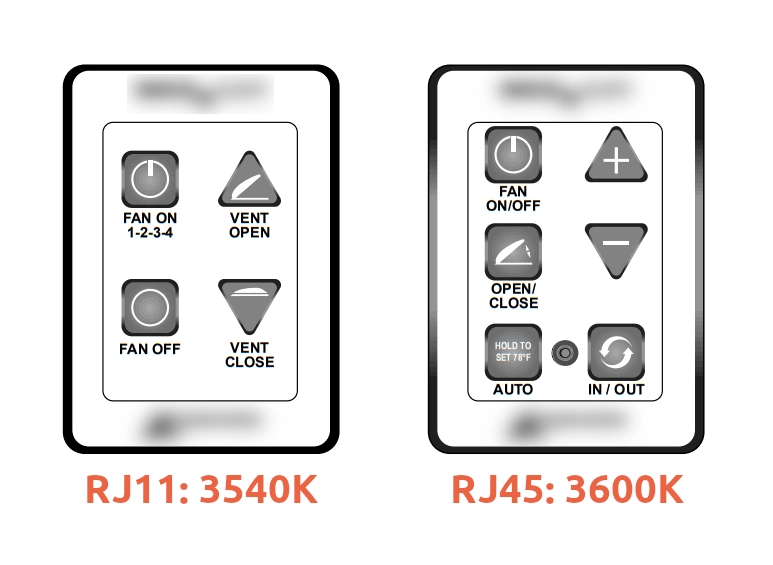
We emulate a first-party 3540K button wall control panel for Plus fans or a 3600k (or 3650K) 6 button wall control panel for Deluxe fans. But instead of buttons you have to press yourself we use optocouplers to trigger the signals to the fan electronically. The way this works inside the fan is exactly the same as when you press a button on the control panel, so all inputs you can do there can be done by the VanTurtle controller.
Can I use any Ethernet cable to connect it?
We recommend using a quality cable that is rated for Power Over Ethernet. This makes sure that the wire you use actually has 8 strands inside it, as some cheaper cables only have 4 strands total. It’s best to keep the length of the cable under 10 meters (32 feet) to keep the voltage drop within acceptable ranges.
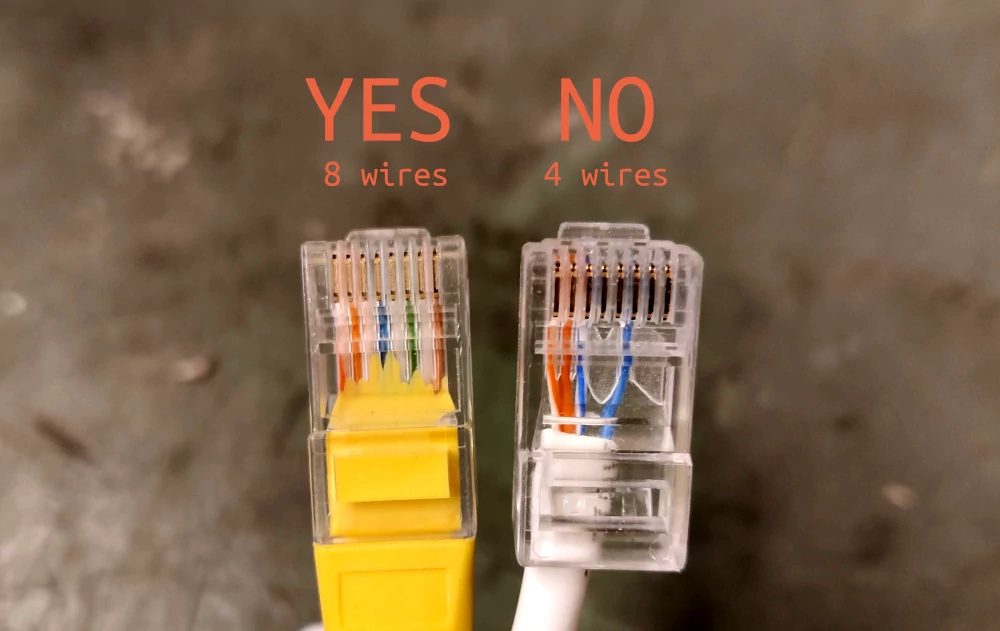
Note however that the Ethernet port is located in a part of the fan that gets almost entirely cut off when you lower the fan onto the ceiling. Using a compact or “short body” Ethernet plug is a necessity. Neither plug shown above is short enough, they just show the difference in conductor count.
