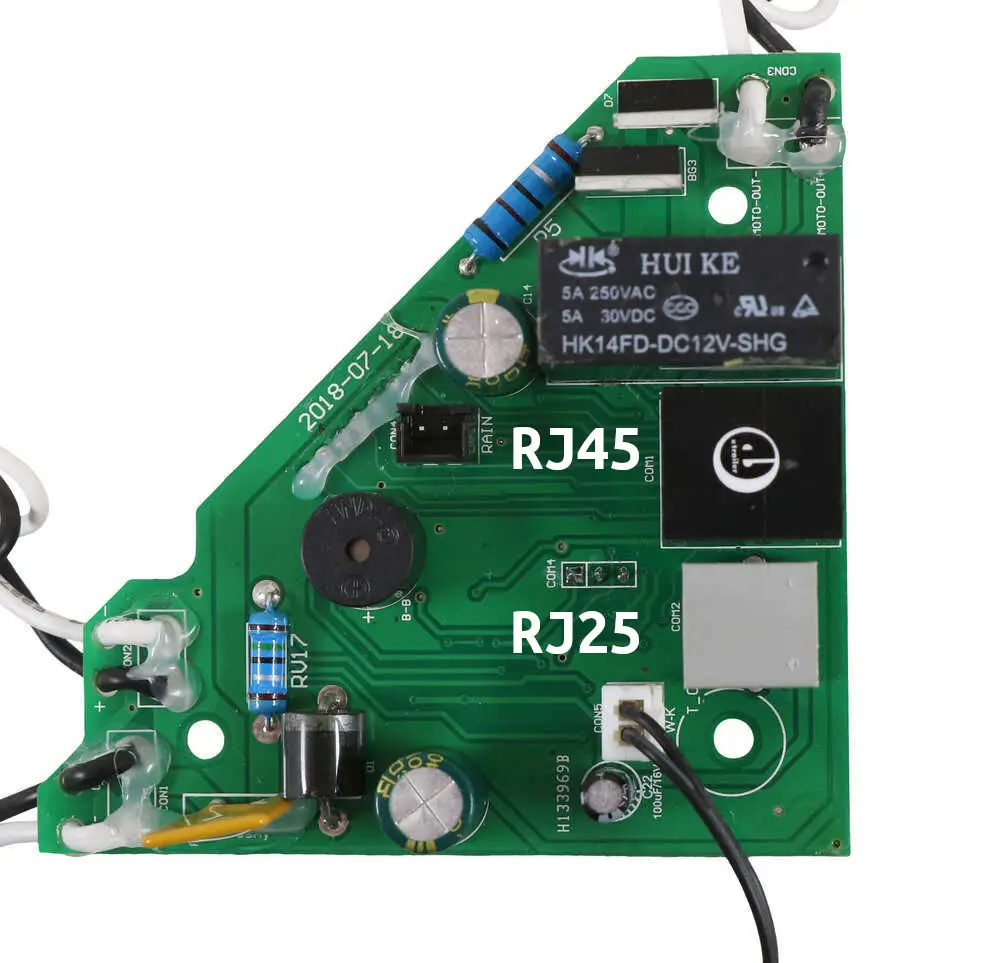
Controling a Maxxfan through the phone jack
The VanTurtle Fan Controller usually uses the Ethernet (RJ45) port to control a Maxxfan, but with a little work it can also use the phone jack (RJ11/RJ25) to have slightly different functionalities. You will be able to turn the fan on and off, open and close the fan, and cycle through 4 predetermined speeds.
This is useful for those who have a Maxxair Plus model that only comes with the phone jack, or for those with only one fan that want to use the functionality of both the RJ45 and the RJ25. By swapping a few wires around you can make a crossover cable that makes the VanTurle controlled fully compatible.
Once you have the cable in place, you should be able to close the fan by pressing the physical button on the VanTurtle board. Then you can automate anything you want. Connect an ESP32 to control Maxxair with your phone over wifi, or a Raspberry Pi to integrate it with Home Assistant.
How to connect the fan
First you will need one spare RJ25 connector (same as RJ11 but with 6 conductors), one RJ45 connector, a crimping tool compatible with both and either a 6-wire phone cable or an 8-wire ethernet cable. Then connect the wires to the plugs like this:

The colors do not matter, as long as you connect the same wire to the correct pins. The example uses an ethernet wire with an extra orange pair that does not have to be connected. If you use a phone wire you do not have these extra strands and can leave pin 1 and 2 unconnected on the RJ45 jack.
These are the pin numbers that have to be connected:
| RJ25 | RJ45 | Color in example |
|---|---|---|
| 2 | 5 | Striped blue |
| 3 | 6 | Solid green |
| 4 | 7 | Striped brown |
| 5 | 8 | Solid brown |
What is the benefit of using both ports on the same fan?
The benefit of the RJ25 is that is that it can tell the fan to turn on, while the RJ45 can only toggle on/off. This prevents accidentally turning off the fan with an on/off toggle when you meant to turn it on.
Here are the ports on the fan itself: